Every. Single. Recipe. – Going deep into it – Chocolate covered Caramel Cups.

caramel bite
Caramel Cups.
Yeah, that’s right.

This is beautiful stuff from a beautiful recipe.  Actually, it takes in two recipes from Clean Eating with a Dirty Mind.  Caramel Sauce, and then Chocolate Covered Caramel Cups.

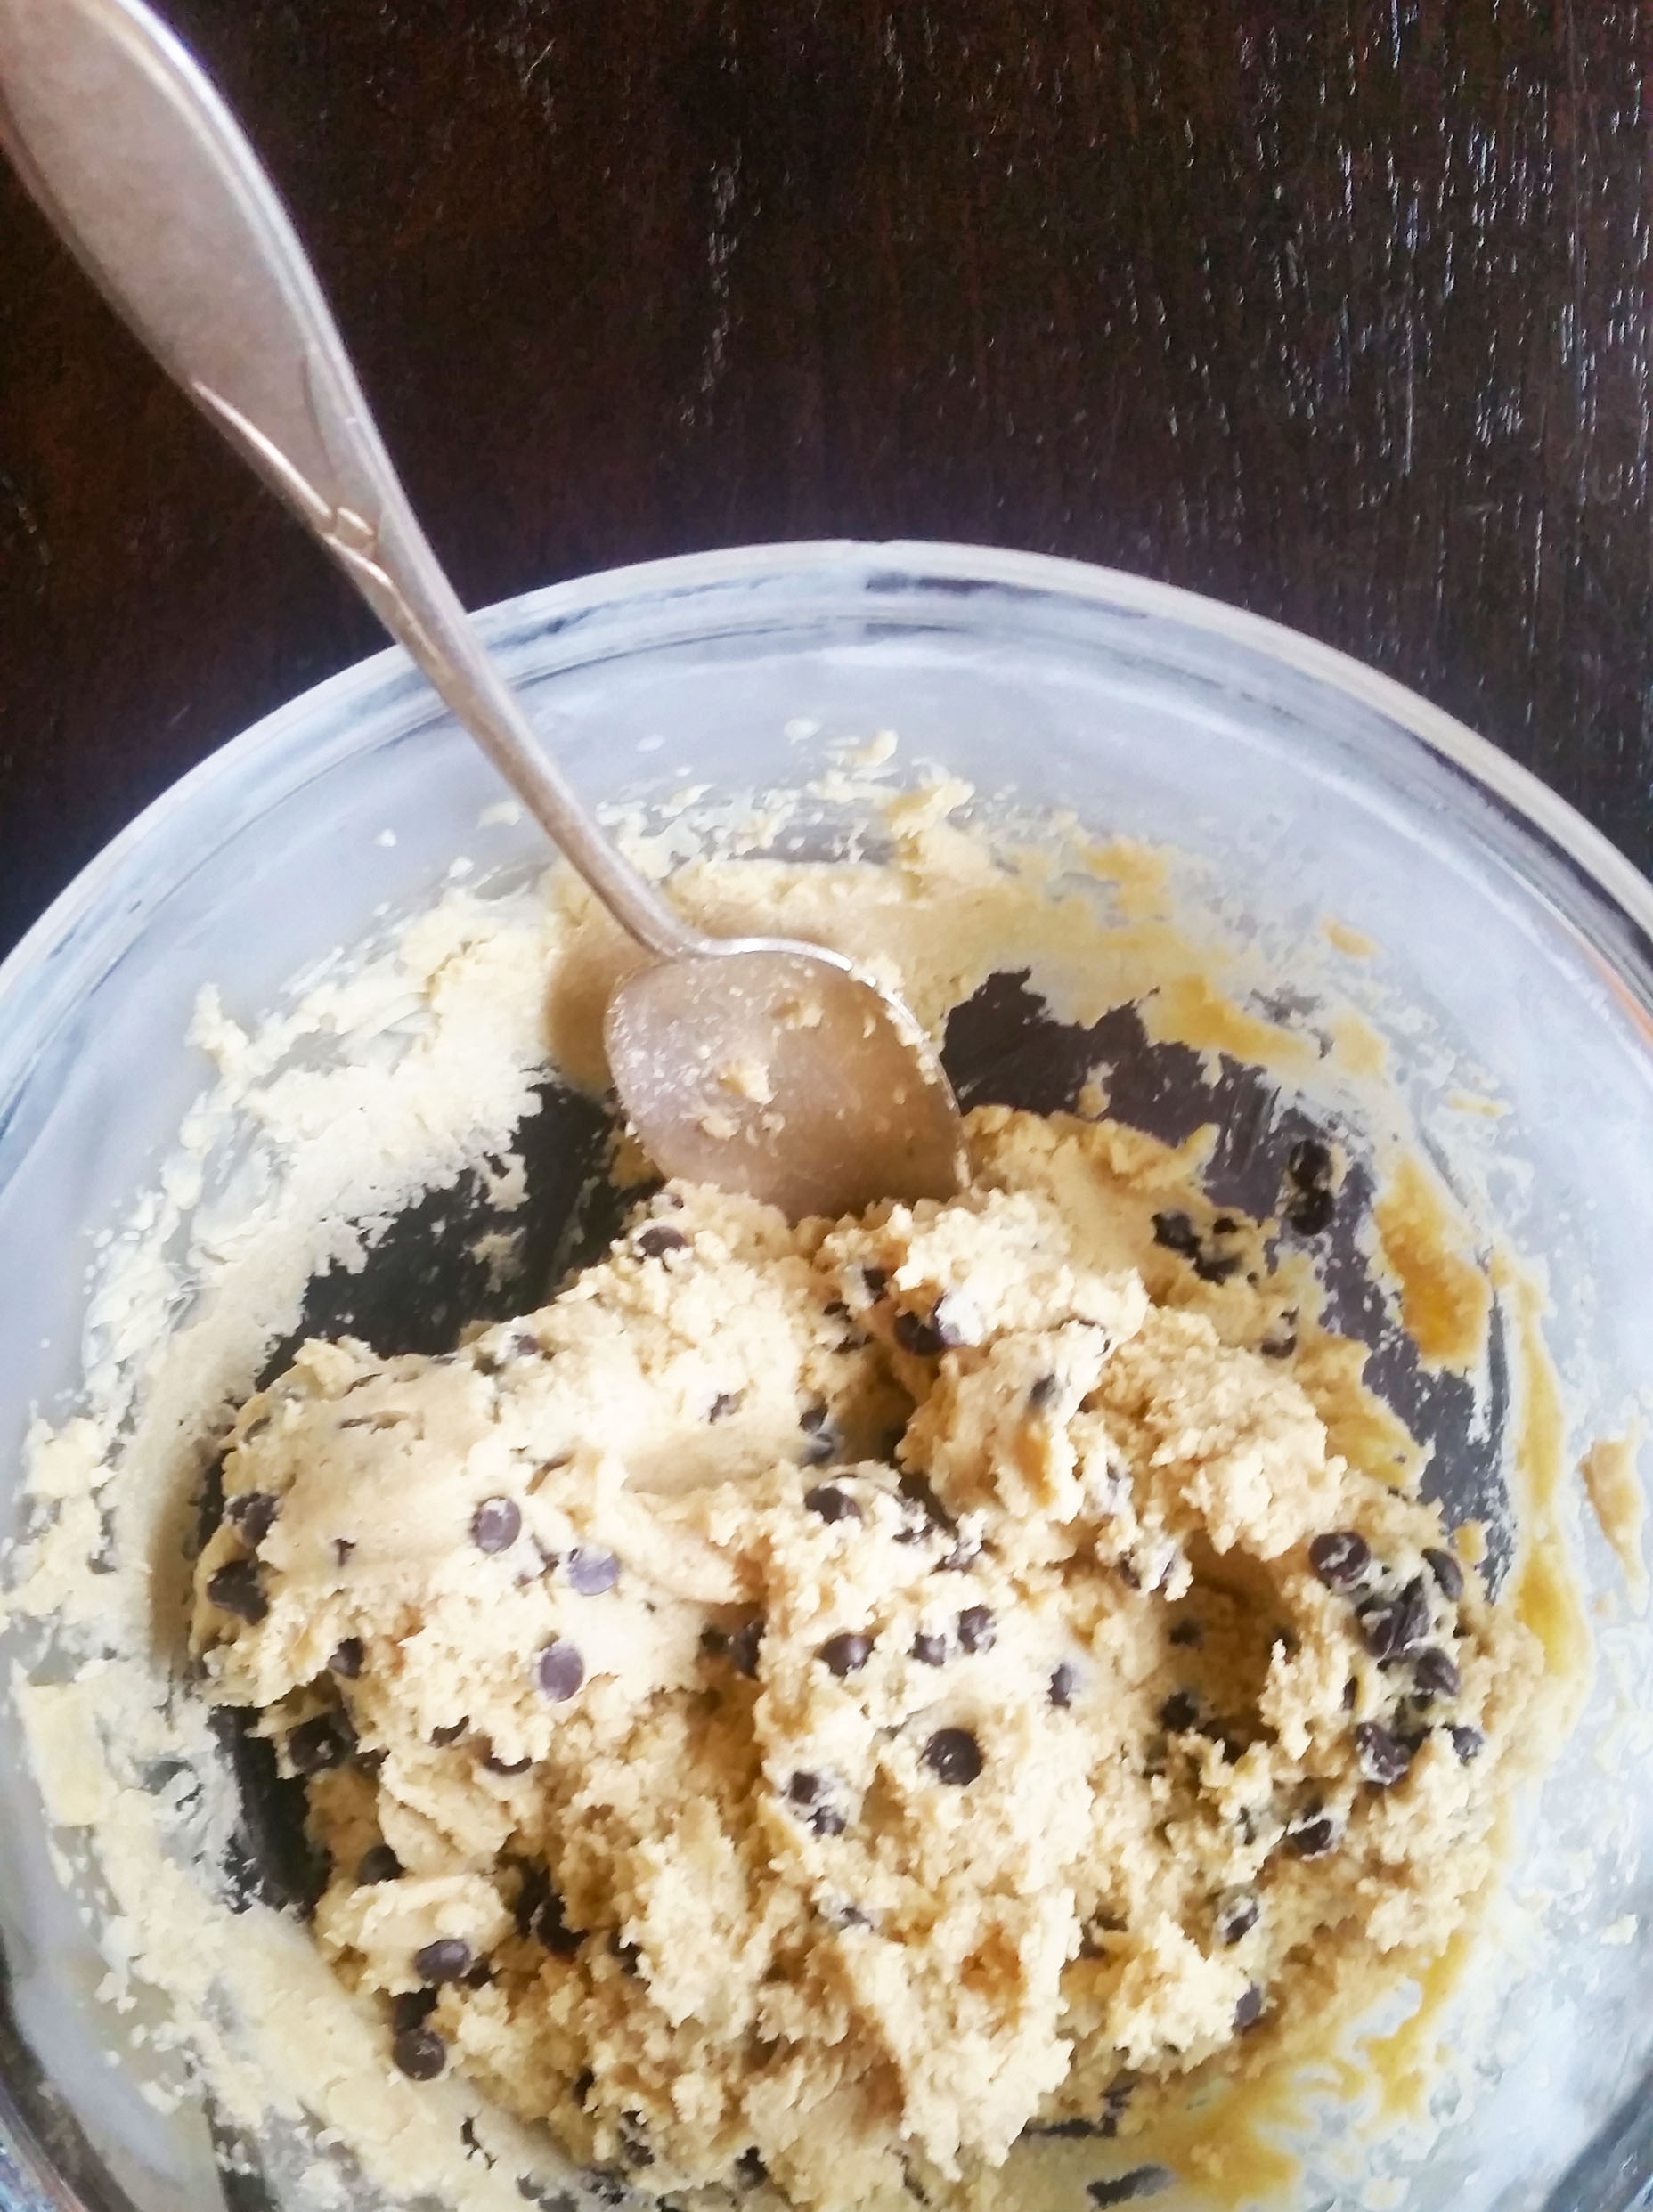
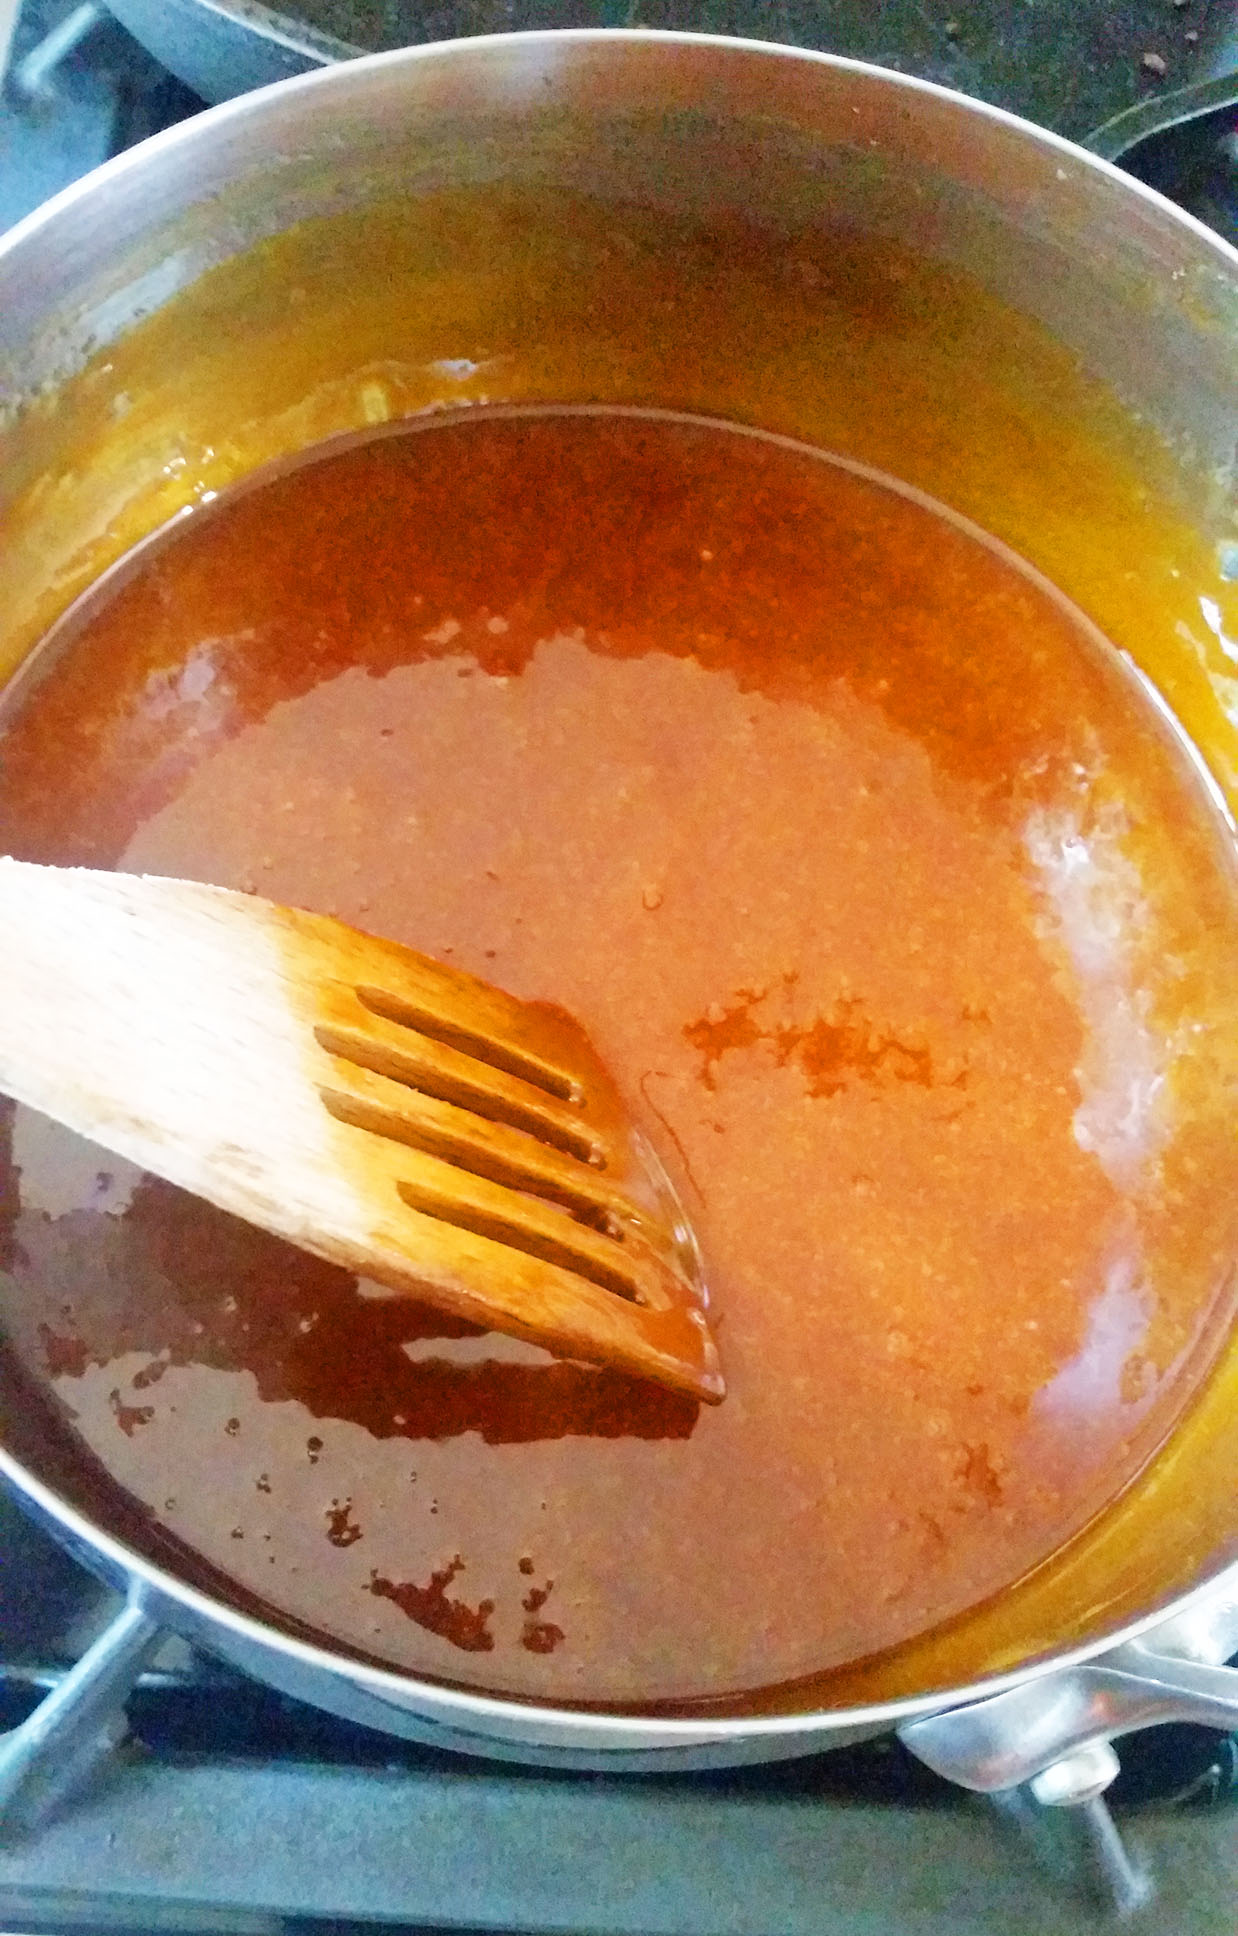
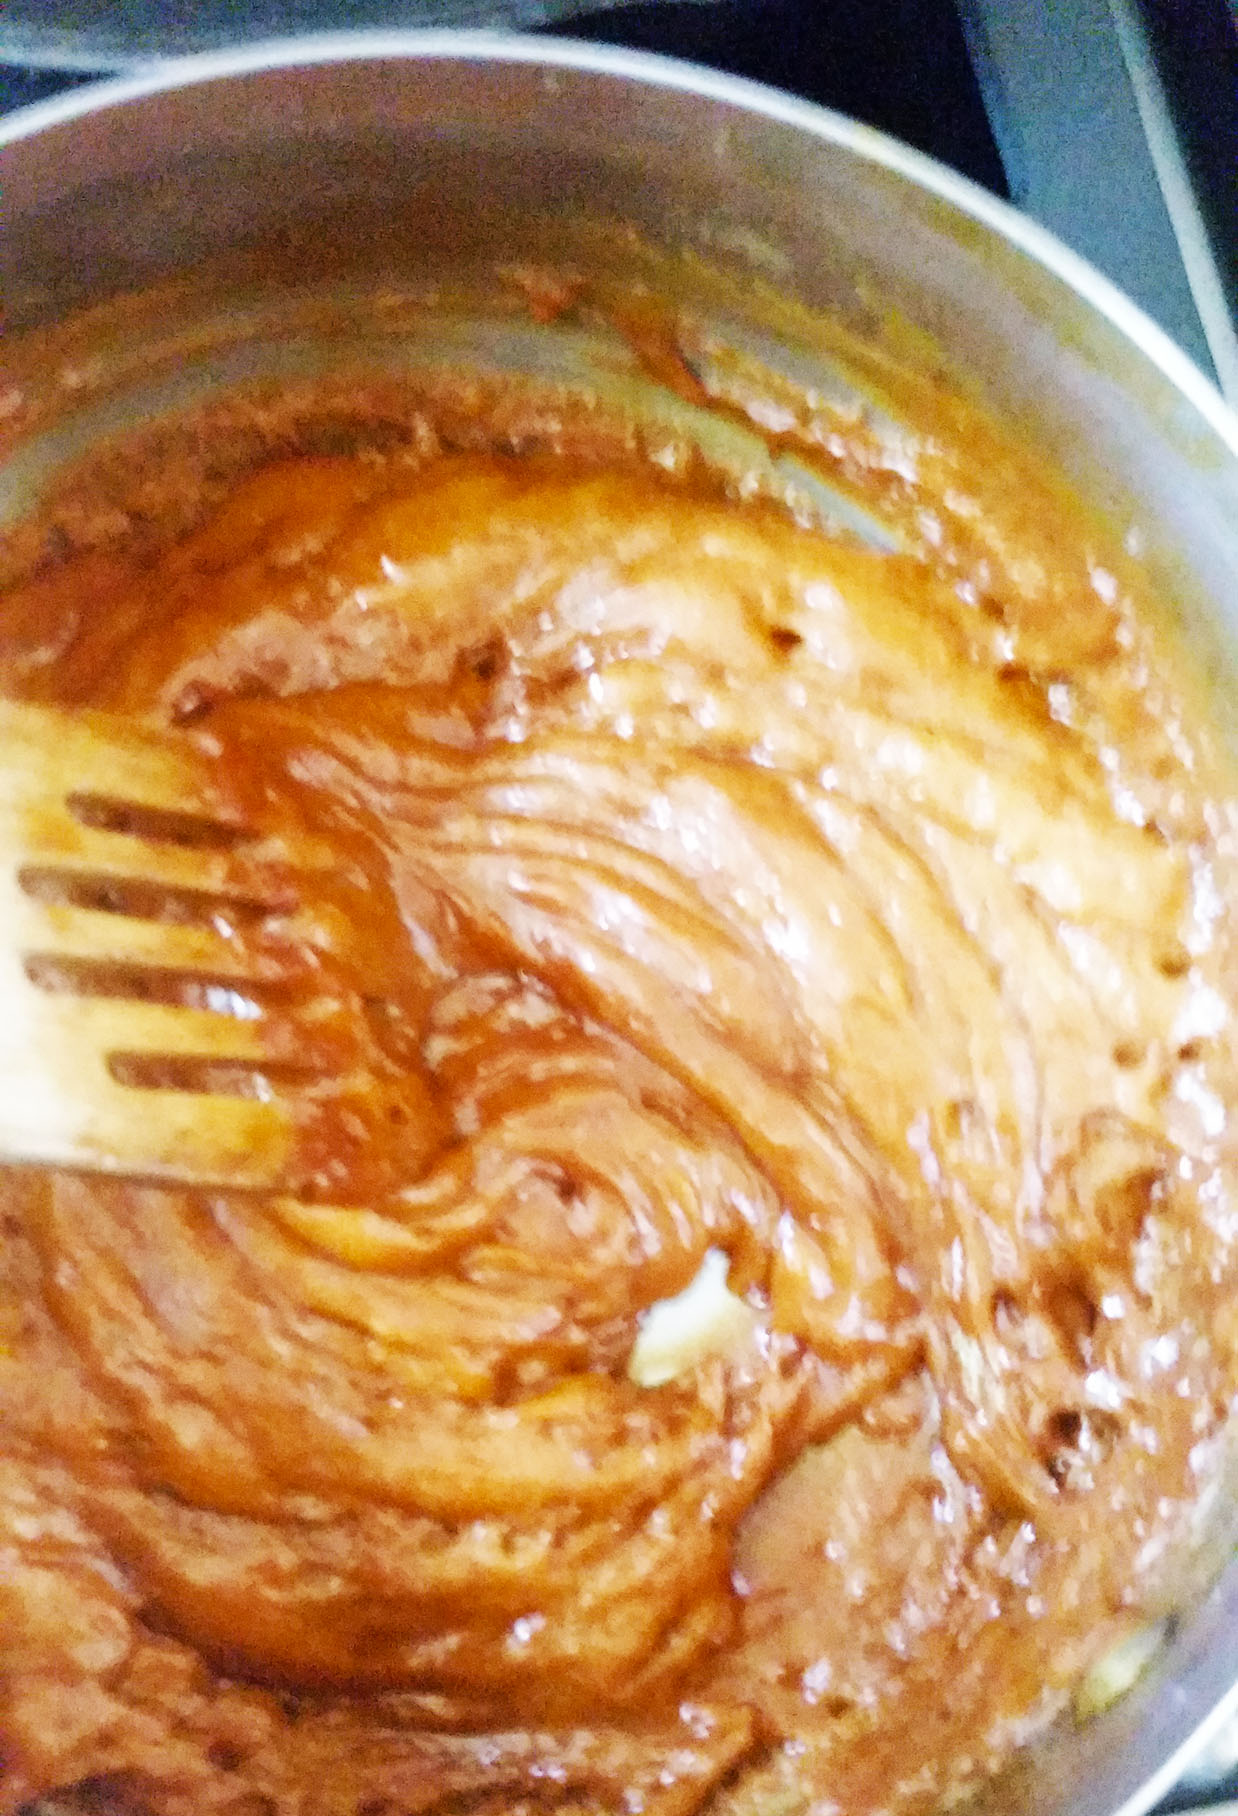
The Caramel Sauce itself is just lovely.  Smells divine, easy make.  My personal tip?  Watch your temperature.  And…consider not putting it in the freezer.  At least in my climate (Houston, TX)….the fridge should do it.  In the freezer, it froze rock solid in minutes and never went back to liquid…but never fear….I mananged to heat and stir it back to softer and form it into little balls, pressed them into the chocolate…and then you get the pic above, which, is the DEVIL!  So decadent and rich, even my husband (who would normally eat something like this like popcorn) said it was so rich he couldn’t eat more than one. DANG!

The flavor of the caramel is just beautiful…especially when you realize it comes from coconut milk!!  Crazy good!caramels
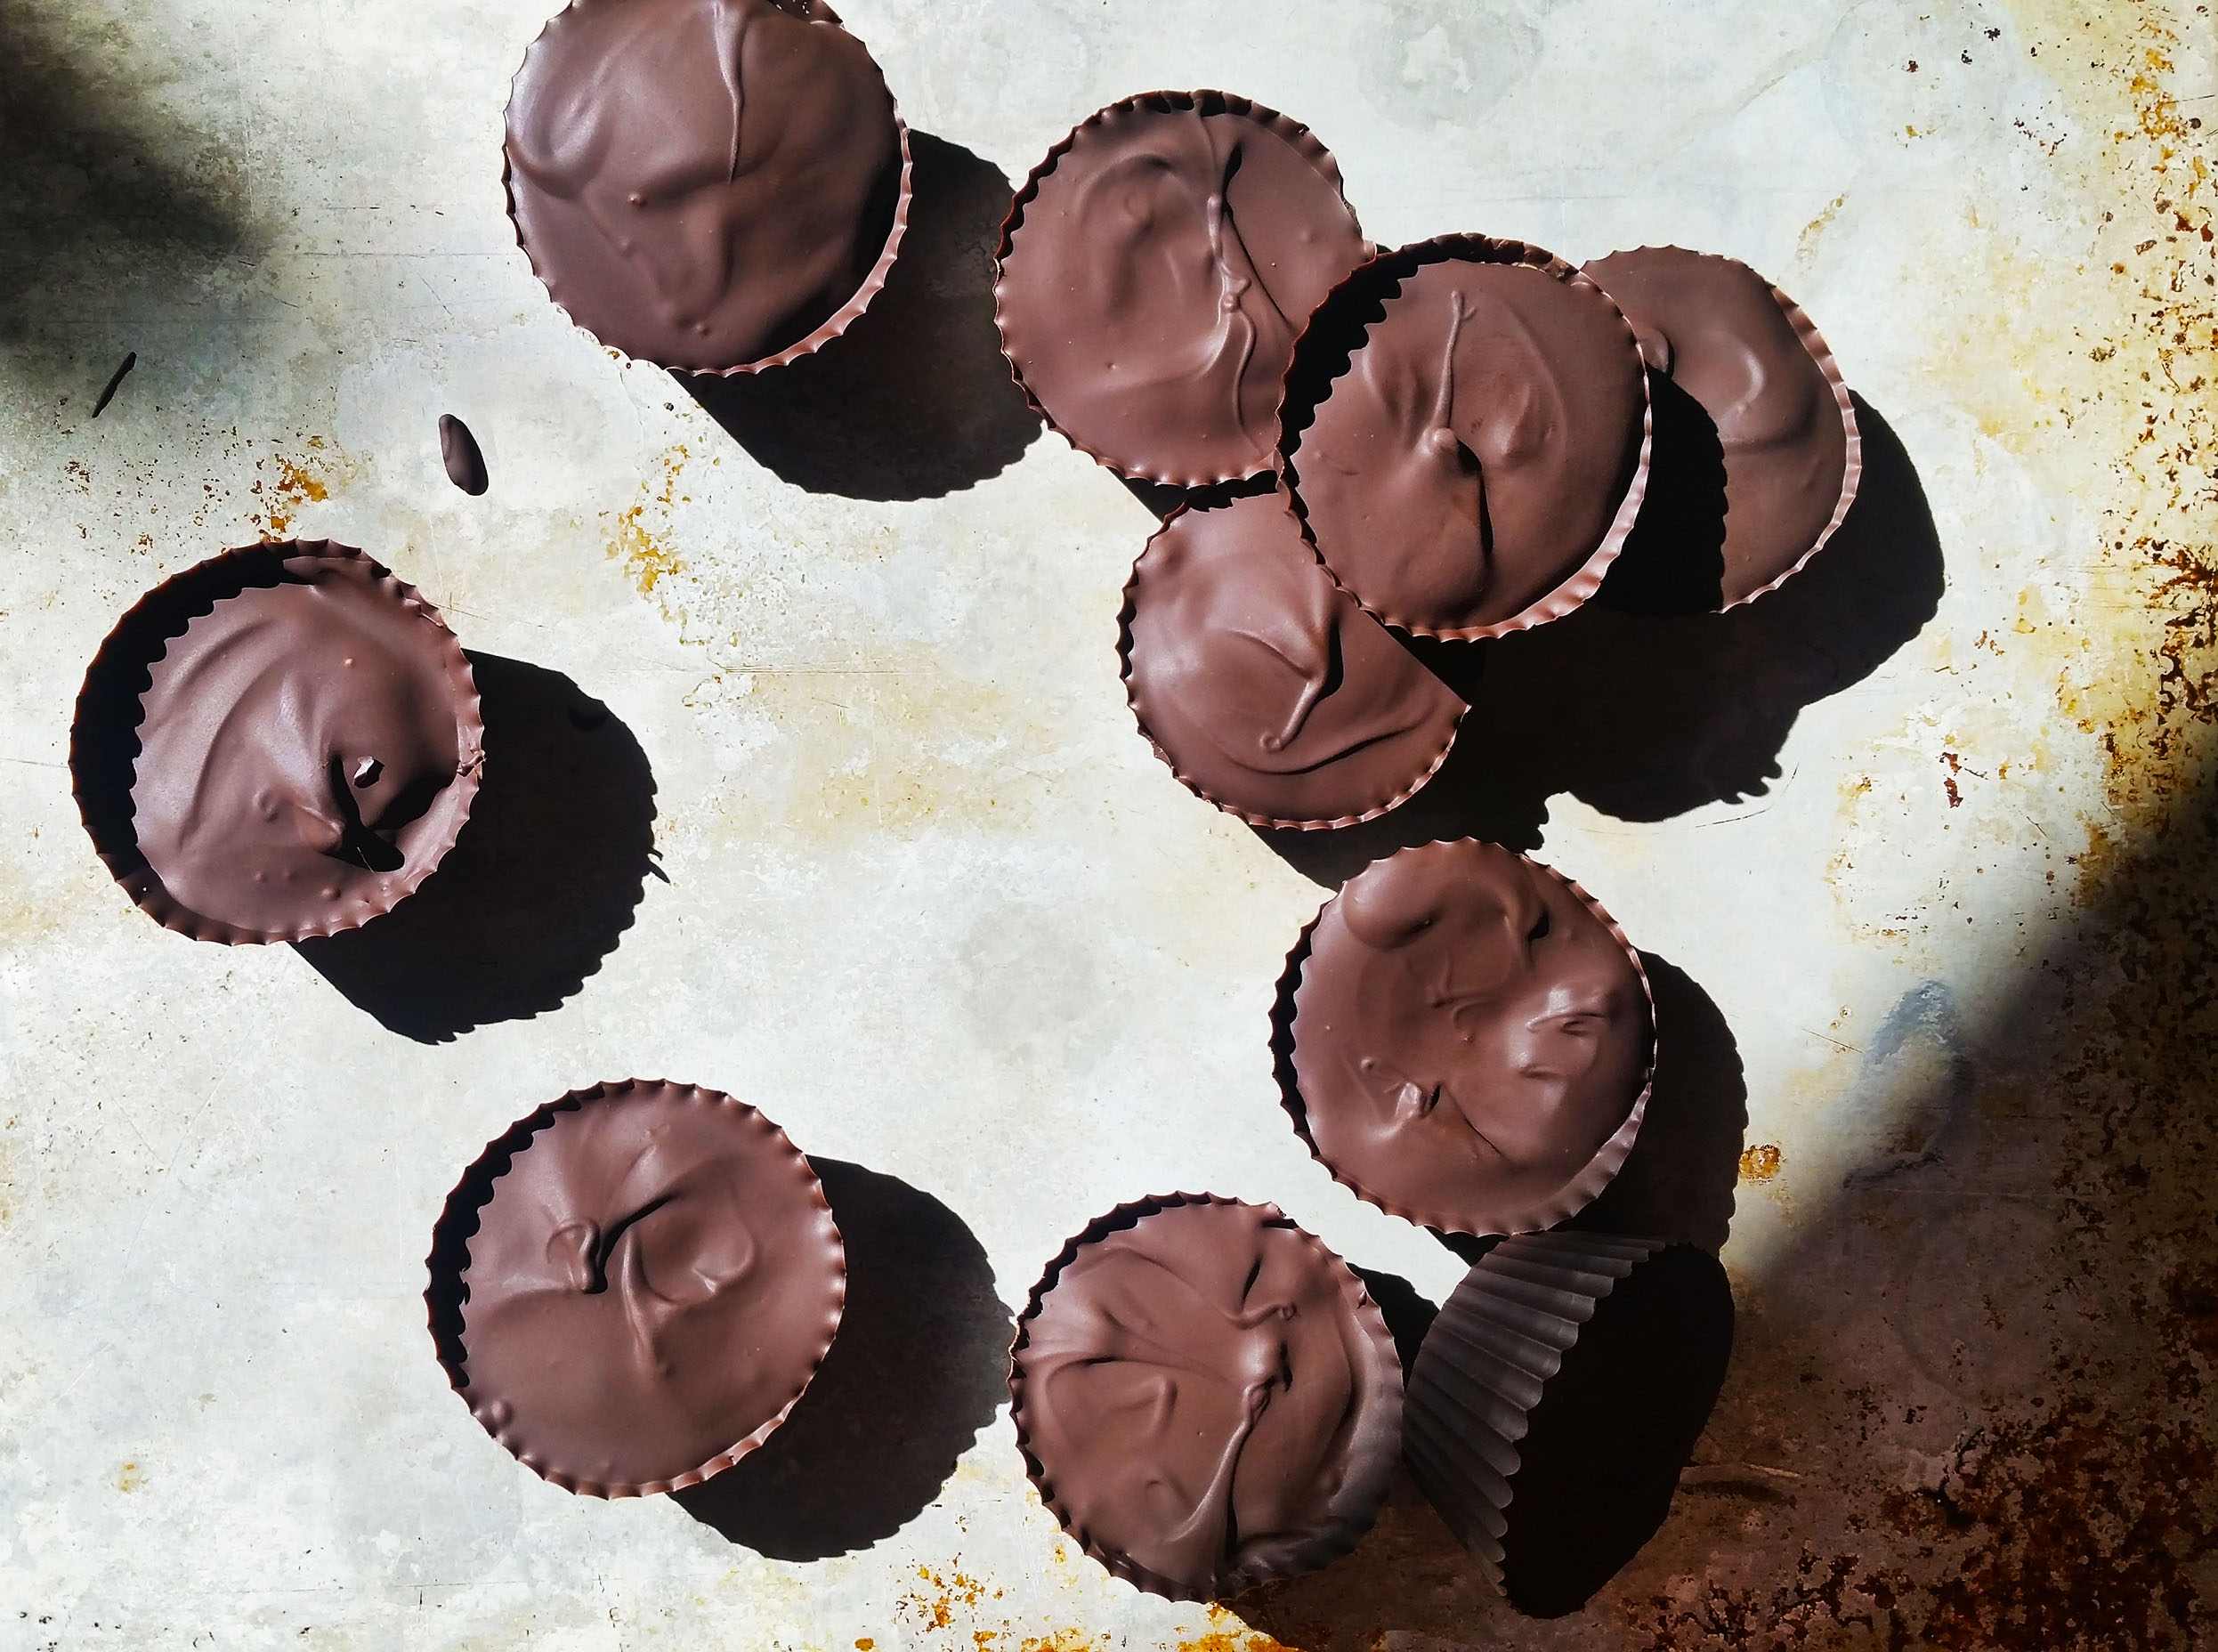
So, yeah. Do these. You will not regret it at all!  I’m thinking these will be beautiful on your Holiday spread!

Oh one other thing, she leaves you on your own to pic the level of chocolate you use.  I used semi-sweet mixed with dark chocolate.  I will go all dark chocolate next time…the caramel is so sweet you can go deep and dark with the chocolate and still have plenty of sweet!

I hope you give these a try, they were fun to make!  And more fun to eat!  (Don’t panic, there are plenty in the fridge right now!!)

Kristen

Advertisement

Every.Single.Recipe. – Cookie Dough Fudge – Clean Eating with a Dirty Mind RECIPE SCORE!

oblique

My latest try, and huge success, Cookie Dough Fudge! And today, via the magic of internet links, you can try this recipe out yourself, as if you don’t already have enough reasons to run out and pick up the cookbook, go to http://www.thespunkycoconut.com/2015/09/cookie-dough-fudge/    where Vanessa Barajas has given The Spunky Coconut permission to post the recipe…a teaser if you will!  (Pluse if you are not already familiar, The Spunky Coconut is a great blog, she has some great recipes, info and photos, I have followed her on instagram for years!)

Okay, back to business here.

1st

Not complicated, simple clean ingredients and the magic of a cashew base, if you take the extra 5 minutes and do the browned butter, you will end up with an incredibly close rendition of toll house cookie dough flavor! I went with mini chocolate chips…I’m really in it for the dough, so the minis are always my choice with cookies. Be warned, you gotta pull out alot of equipment to get it done, but it is pretty quick. And because of the type of dough it is, it all cleans up easy. (saucepan, food processor, beaters, bowl, pan, spatulas….maybe not that much??) I just grumble about the food processor really, because I keep mine under the sink and I always time it so it just won’t quite fit in the dishwasher! haha…but then I stuff that chunk of Cookie Dough Fudge in my mouth as I wash the dishes and it’s like little kitchen pixies are there with me making it all get done quickly with sparkles and twinkles!

bowl

So, yeah. If cookie dough is your thing, you really need to do this. I sent a pic to my daughter who is in college several states away and her response was… “STOP.”

I told her not to worry! It’s in the freezer waiting for her on the next trip home!!

side close

One more shot for the road….
Get in the kitchen already!
Also, pick up your copy of Clean Eating With A Dirty Mind, you will be so happy!

Give me some feedback on how you are liking this series of posts…and PLEASE pass along the word about my blog!  I know I am having fun with it!!! Hope you are too!

Kristen

Every. Single. Recipe. Soft Batch Chocolate Chip Cookies – Clean Eating with a Dirty Mind

OK!  Here we go! This post will take in 3 more recipes from Clean Eating with a Dirty Mind, bringing the count to 7/152!  good stuff here…Chocolate Chip Cookies that are grainfree, gluten free and delicious!cookies
Now, let me start off by saying I have ORDERED the FINE ground almond flour/meal that the author recommends, but I have not received it yet. SO.  I intend to do this a second time with the right grind…as the photo in the cookbook looks much fluffier and more “floury”…these look more like all of the other paleo cookies I have made with traditional almond flour.

cookie balls

Either way, these are quite good!  They actually have a much richer flavor due to Barajas’ signature “Browned Butter” used in this recipe and others.

Quick aside….this is what beautiful Browned Butter looks like….sorry, I cannot pass along the gorgeous aroma here….

browned butter

She also uses Maple sugar throughout the book and in this recipe…I could not get my hands on any locally so I went ahead and tried her method for “Maple Sugar” which is really cool!  It is like a little science experiment and very easy, I was so amazed at how it turned out!  Not difficult at all, although it does take time.  Definitely less expensive (by about half!) than store bought, and my local Whole Foods does not carry it.  You can order off Amazon, but I decided I would give it a whirl…here are the progress pics!

ms step 1 ms step 2 ms step 3 ms step 4So, pull on your baking stockings and try these!  Tasty, soft with a good bite to them, a nice treat to have on hand for sure!  But loved making the butter and the sugar best!  And now that I tackled those right off the bat I won’t be intimidated in making either one in her many other recipes that call for them!

Note:  I had 2 cookies.  My husband, who is not Paleo, ate all of the others.  ALL.  Yep.  Gone.

I think they will be fun to put with the ice cream for ice cream sandwiches, really nice texture and flavor for that.

So let me know if you try these out…especially if you use the right flour, fine ground Almond Flour…and if they look more like the photo in the book….cannot wait to post that picture!!!

Probably be the weekend before the next round of recipes come up….wish me luck and see you then!

Kristen

Every. Single. Recipe. – Two-Fer! Spicy Chipotle Dishes from Clean Eating with a Dirty Mind! And a MAYO bonus!

hot dishes
This is where the spicy delicious lives!!! Right here!

So clearly it did not take me long to figure out of the very few non-dessert type recipes, these two needed to be taken on as quickly as possible!

Chipotle Cole Slaw (page 86) and Chipotle Chicken Salad (page 102) are both big winners!  Not only do they big time deliver on that smoky, spicy goodness of Chipotle pepper deliciousness, but they are quick and easy recipes!  Both would be great for a crowd or kept on hand for quick lunches during the week!

slaw

The slaw is VERY spicy!  In fact, I may have to tone down the amount of pepper in my next batch, but what a great twist to cole slaw!  I added extra lime juice to help tame the heat…i think serving a few slices of fresh avocado along with it would be great!  (slaw is on the left in the pic above and also on the left).

The chicken salad is fantastic!  This is the spice I am always looking for in chicken!  I decided to serve with cold grapes and apple slices, because I wanted to see which would be better along with that heat, plus I love a little fruit in my chicken salad.  Grapes were the winner for me, although the apple was very good with it to…would even be nice with either one diced up and tossed in at the last minute!

chicken salad prep chicken salad

You will notice that dollop of mayo in the chicken salad prep pic above…this is the mayo from the book as well…(Easy Immersion Blender Mayonaise, page 78).  This is a nice mayo, more mustardy than my basic mayo (it’s on the blog as well).  Simple ingredients, simple process with the immersion blender.  My tip here?  When you use an immersion blender, it eliminates the need for the slow drizzle of the oil into the mayo.  Dump all your ingredients in, including the oil, and put the blender wand all the way in to the bottom of the jar and blend continuously until you have the consistency you want.  Easy!

mayo one mayo 2

So that’s it!  Three great recipes from Clean Eating with a Dirty Mind  (Vanessa Barajas) in one hit!  All three are simple and delicious!  You should definitely give these a try…

Let’s see…that puts my count at 4/152  (4 recipes completed out of 152)!  Every. Single. Recipe!

Let me know your thoughts, comments, questions…or if there is a recipe out of the book you want to see sooner rather than later!!

Keep cooking!

Paleo Pizza with a CRISPY thin crust! (yeah, I said crispy!)

20140816_134158 (1)


I know, I have been missing for a while. As much as I think I am a blogger, I really spend all my time raising my daughter and working.
So I finally buckled down and got myself an awesome personal trainer who is helping me get the fitness thing going, and I have had a few moments to think about things in the kitchen!
After my workout this morning, I was crazy hungry and just wanted to lay down. But my brand new copy of ZenBelly (amazing paleo cookbook…give it a read!) was laying on the table as I walked by and I flipped through it becoming more and more inspired. I took a few notes of things i needed from the store to make a couple of the recipes and headed to Whole Foods. While there, I stumbled across the most beautiful tomatoes I have ever seen! And what crossed my mind was pizza.

I have tried many different pizza crusts from different cookbooks and in restaurants…all trying to be the best paleo crust ever and all they ever tasted like were burnt nuts, and soggy at that.
I have used a recipe a couple of times that got the flavor right, but still got soggy as soon as you put toppings on, so I decided to start tweaking it. And this time, I got it! Real pizza crust flavor and crispyness to the crust that doesn’t sog out in the first 5 minutes!

There are more pics of this over on my instagram at paleo_k so come check it out!

Alright, enough banter, on with the Pizza!

Pizza Crust
In a large bowl, combine:
1 cup Tapioca Flour
1/4 cup plus 1 tsp Potato Starch/Flour
1/2 tsp salt
In a small bowl:
1/3 cup water
1 tsp gelatin (sprinkle over the water)
1 egg
1/4 cup olive oil
Whisk the wet ingredients and add to the dry by mixing with a spoon until combined then kneading with your hands a few times.

Press dough out on your cookie sheet or pizza pan (greased with olive oil). I like to split the dough into 3 or 4 small crusts for more crunch edges. Press the crusts out to about 1/4 inch thickness. Prick the crusts all over with a fork and put in a 400 degree oven for 16-18, until golden and lightly browned.

Remove from the oven and start building your pizza!

MY PIZZA:

Brush the prepared crusts lightly with olive oil.
I topped with shredded Rumiano’s mozzeralla cheese (from organic grass-fed cows!)
VERY thin slices of onion
Thin slices of cherry tomatoes
torn basil
Light dusting of salt and fresh cracked pepper

Put under the broiler for 3-4 minutes, until cheese melts and begins to brown.
Cut with a pizza cutter…..and devour!

NOTE:  I find when I use pizza sauce, the sog happens.

My Twist on Stuffed Peppers

stuffed peppers 2

stuffed peppers 1

There is a great recipe that I have gone back to over and over for stuffed peppers in “Practical Paleo” by Diane Sanfilippo. It is basic and tasty and good for you! Easy to prepare ahead, even to have in the freezer.

I am always wanting an additional flavor punch. OK. I can’t help but tinker with recipes sometimes.

So with the addition of Chorizo for flavor punch, and spinach for extra veggies, and cumin and double the garlic? OH you just have to make this, it is so good!

Here’s what:

My Twist on Stuffed Peppers:

Preheat your oven to 375 degrees. While doing that, halve and remove seeds from 3-4 red bell peppers. Place these in a large pyrex dish, flesh side up, and roast for 20 minutes. Take them out and let them cool enough to handle….flip over and they are ready to stuff.

The Filling!
1 pound grassfed ground beef
1 pound organic chorizo (I use a veal chorizo)
begin browning these two ingredients in a large skillet.

As the meat browns, add:
1 onion, diced
8-10 cloves of garlic
salt and pepper
1/4+ tsp red pepper flakes (depends or your heat pleasure!)

Keep moving it all around in the pan, browning the meat and onions as you go.
Add in 1/2 tsp or more dried basil and oregano
add 1/4 tsp cumin
Add in 1 can fire roasted diced organic tomatoes
Add in several handfuls of baby spinach (fresh). Up to 10 oz.

as the spinach wilts, turn off the heat….this part is done!
You can add in some fresh basil leaves at this point as well.

Fill your roasted peppers with the meat mixture, and any extra meat just tuck in around the peppers, someone will eat it!

Put back in the over at the same heat for another 15-20 minutes to heat through and let the flavors meld. (Especially tasty the next day!)

Because of the flavors involved, you can push this as mexican food or italian…maybe this is fusion? I don’t know. But it is a meal in itself. Or you can dice a little avocado on top! Or serve with a salad!

So dern good. You need to try this one!

A Lovely Plate

again 2

Nothing complicated here, just clean, easy yum.

Fresh avocados with a squeeze of lemon juice and a dusting of coarse sea salt.
Thick cut no sugar all natural bacon, perfectly fried.
A small pile of fresh fruit, all organic.
And the raw crunchy salad I am so addicted to!

The fast way today:

In the bottom of the bowl, 2 TBSP of home made paleo mayo, 2 tsp honey, couple of splashes of raspberry balsalmic vinegar to taste….wisk wisk wisk.
Now add to the bowl a handful of bite size raw broccoli and of cauliflower. also a few dried cranberries. (I usually add radishes and pecans, but was in a hurry!).
Now toss everything together! The longer you have, keep tossing and the flavors build!

So dump the salad on your plate, your done!
Ready, set, delicious!

Oh Simple Thing, where have you been?

20140505_185956

The other night I was on my own for dinner, for a change, and was really having too much fun in the kitchen trying to time a quick meal that would be healthy and yummy while watching the Voice, (vice!) And I remembered a beautiful bunch of asparagus I had in the fridge. I had to do something with it! And it had to include my home made mayo! (The husband only likes mayo when he doesnt know he is eating it, same with my daughter. They see white and start gagging!!!)

So this little side dish made it on my plate, and besides being oh-so-good, was a pretty little number too!

Quick cook the asparagus…2-3 minutes in a shallow pan of boiling water, drain and squeeze lemon juice over the asparagus with a bit of salt.
Have a few pieces of bacon frying up while that is happening.

Place your asparagus on your plate, give it a very generous dollup of home made paleo mayo, and crumble your bacon over the top!

Could it be more simple? Maybe, but dang this is easy and so so so good!
I used nice fat asparagus this time…I usually prefer the thin, but these were fun to just pick up and eat.

Try it. You will like it, I am sure of it!

Let me know what you think!!!

Nom!

Refreshing light lunch – Paleo Chicken Salad

chicken saladckn salad prep

My usual hurried run home for lunch found me with a few extra minutes, I actually got to eat it at home instead of packing it up to go!
A grapefruit was calling my name loudly…and I knew that would be in the mix, but I wanted to change up the chicken a bit, so I took the Poached Chicken I have been eating off of this week and diced it up to make a quick chicken salad today….really nice!

Here’s what I did…

Paleo Chicken Salad:
1 cooked chicken breast, diced
2 celery stalks, diced
1-2 radishes, diced
Handful of halved grapes
small handful of chopped pecans
salt and pepper
juice of 1/4 lemon
2-3 TBSP home made mayo (see previous post)

Mix all of the above gently and enjoy!
Of course there are a million variations, I was really wanting a little fresh parsely, but I was out!

Simple, beautiful, mayo

mayoI was asked by a follower on instagram for this one…

I have been a big fan of mayo for as long as I can remember! My childhood consisted of mayo and bread sandwiches, mayo+white bread+american cheese (!), mayo+lettuce+white bread, and on and on… every day for most of my young life! As I grew up, I would eat it on crackers, veggies, you name it. I would pick mayo over butter any day of the week! And, I was a Hellmanns girl. None of that sweet Miracle Whip or Duke’s (although I learned to appreciate MW on a ham sandwich from time to time…).

I always heard how difficult mayo was to make and that home made was ultra delicious, but very tricky.

When I found paleo living, I saw so many bloggers and chefs making their own healthy mayo which had good healthy fats and amped up so many meals, but the recipes were complicated, often needing all ingredients brought to room temp, some were yolks only, some use the blender, some use the food processor, and often it was a game of chance if it would firm up or break.
I have probably tried a dozen different recipes, multiple times each, and was running a 50/50 chance as to whether the mayo would “make” or not!
I started seeing some people using immersion blenders, and that seemed to speed things up! (especially from the workout of using the old fashioned hand wisking method!….pant pant!)

My mother swears by the immersion blender….and I tried it, several times, cursing it every time, as i just didn’t have knack for it. And then I watched her do it and thought, really Kristen? You can do this…

Here is how you do it….

Use a mild flavored oil….I use a LIGHT olive oil that I find at whole foods (NOT extra virgin!)

Beautiful Paleo Mayo!

so….put all of these items in the immersion blender container or a tall narrow container:
1 cup light olive oil
1 Tbsp water
1 Tbsp lemon juice
dash of salt
up to 1 tsp dijon mustard
1 whole egg

put the blender in the cup all the way to the bottom and start whirring away…bring it up slowly, then slowly back down and up a couple of times until you see the consistency you like…less than a minute.

That’s it! SO simple! and so delicious! This will keep in your fridge about a week or a little longer, if it lasts that long!